Pink Wire Spider

Pink wire spider artist hand made

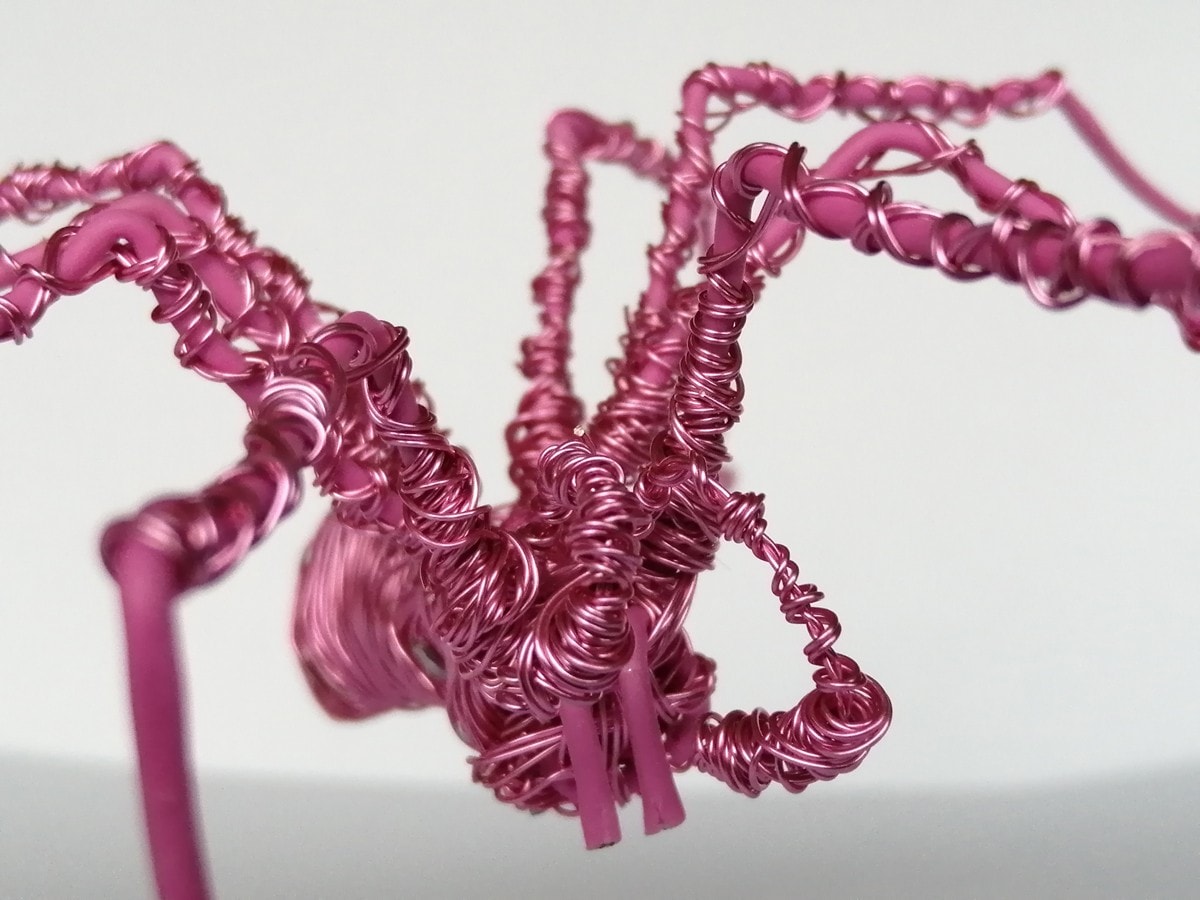
Following my recent progress with the arachnophobia that has plagued my entire life (bar perhaps the first couple of years), I have decided to focus my attention on spiders as a bit of an ongoing project of ‘recovery’. There will be more, but for now, I’m going to talk about my pink wire spider.

Still a wee bit of a ‘work in progress’ (I’ve almost run out of wire), it has taken a few sessions to make.

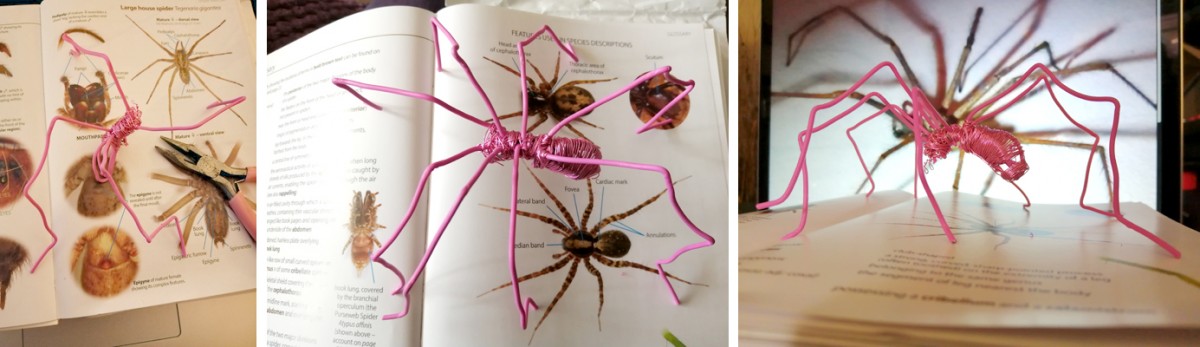
A few early shots:

Wire spider in progress - 3 photos of the process - a starter with 4 legs, then all legs

I took reference from my ‘Britain’s Spiders’ book. A hugely informative guide, it was recommended to me by the font of invertebrate knowledge, and wildlife photographer, Sean Clayton of Sean Clayton Images. I have also been given kind permission to use the images of several arachnophiles in the UK Spiders group (introduced to me by Jim Watt, inventor and chief of Artronix)

The silhouette of my hand made Wire Spider sculpture

Inspiration also came from the dead spider from under my dining room table… (sorry, I have no info to tag him in…) More about this later, but having spent a day with it, closely examining its ‘wee’ body (it was a giant house spider, Eratigena sp) I can report that my fears are another few steps diminished.

Spoiler alert – I did something enormous!!! (in terms of desensitisation, not in a little boy toilet humour sense…)

I had the thought on a journey in a Landrover with my printmaking friend Sharon (of Hidden Galloway) that I could make a wire spider, draw it and then make it into a copper plate. We had been to see the mind-blowing Rembrandt Etchings exhibition at Tullie House in Carlisle, then on to Rheged for another couple of exhibitions. An artist had painted a beautiful scene with elements of (painted) origami. As we talked about it, the idea grew.

My first attempt elicited a few laughs… It only had 2 legs and really wasn’t very spider-like at all! I had to buy some new wire, as my original pink wire is a pretty heavy gauge.

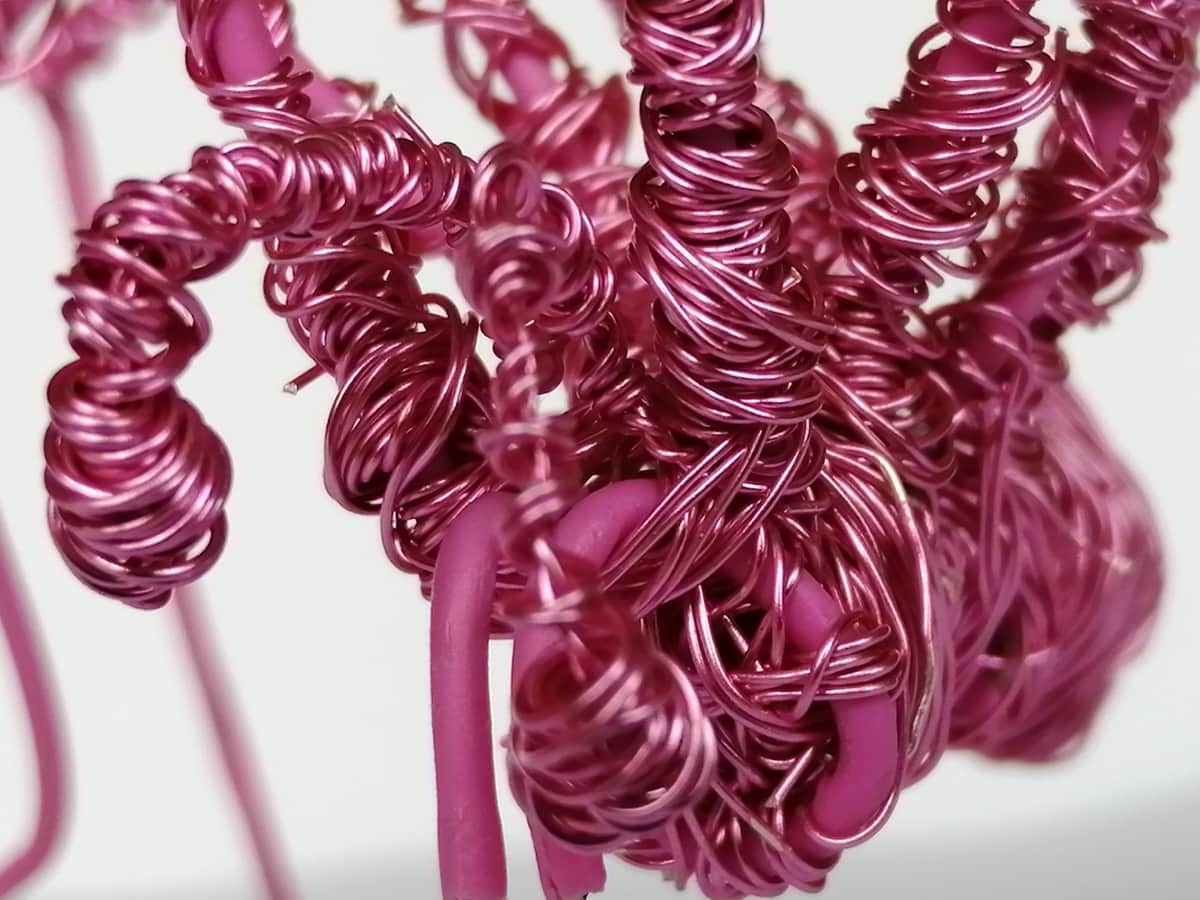
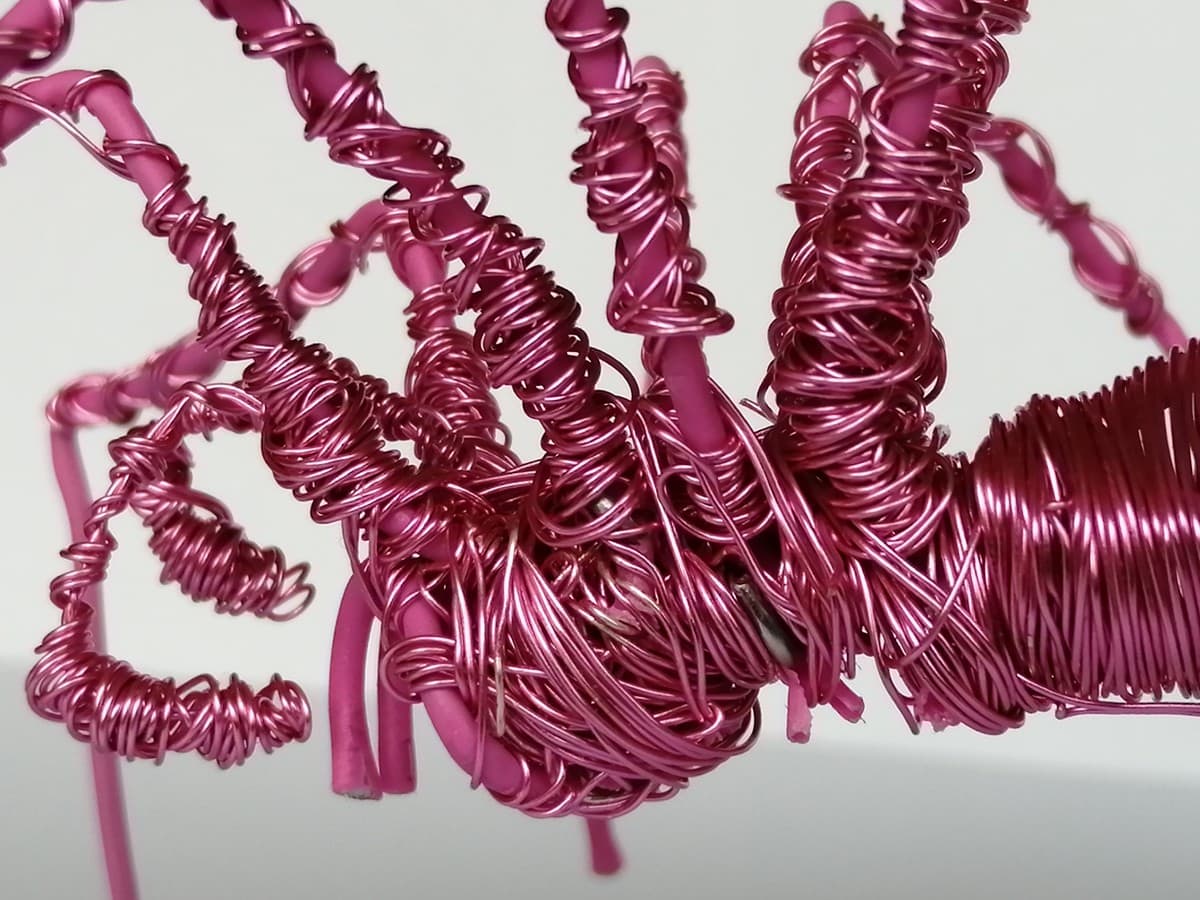
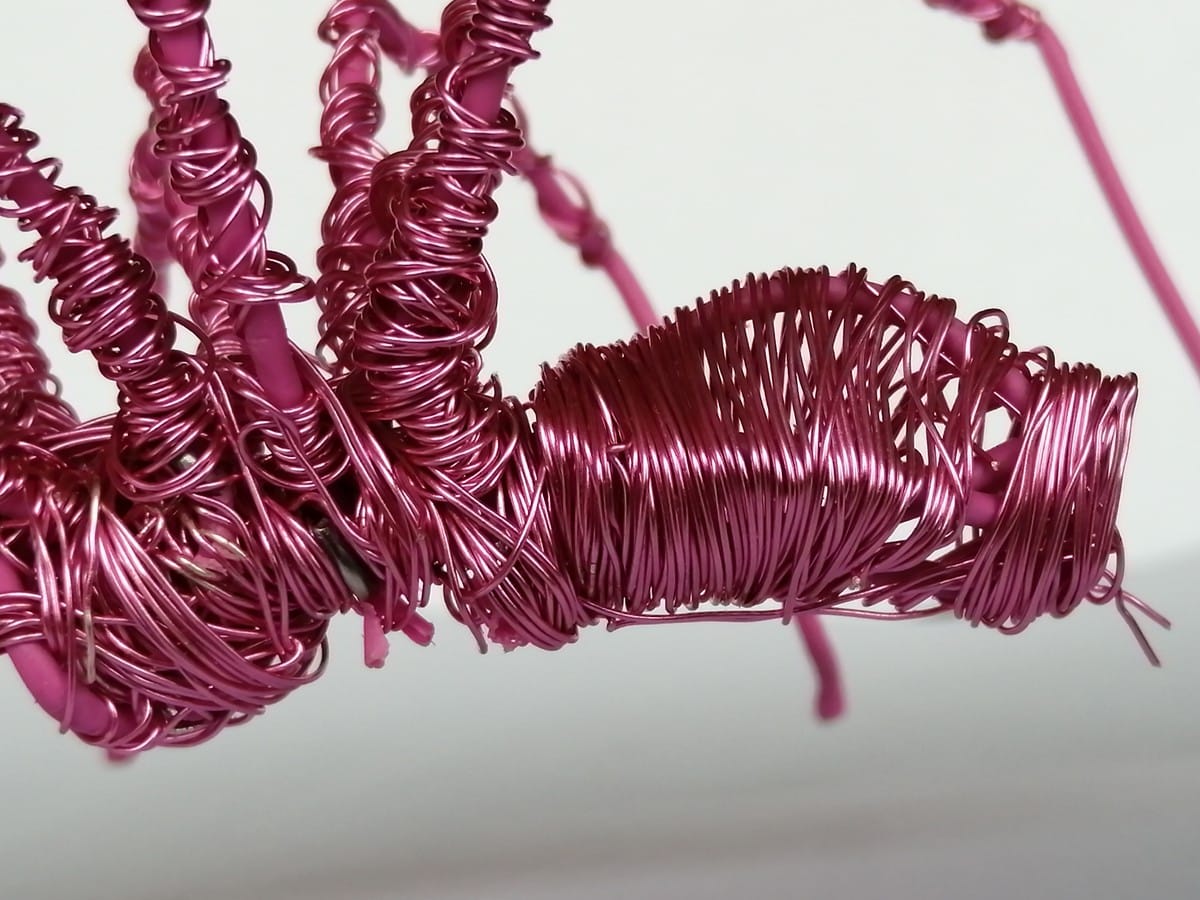
A close up photo of my hand crafted Pink wire spider (head end)

Why pink?

It seemed the obvious choice!

Pink is potentially the least threatening colour of wire I had in my cupboard! Without delving too far, the only other colour I have is green, and it just hasn’t got the same je ne sais quoi. I wanted it to oppose the traditional thought that spiders are menacing, scary and black. Psychologically, the aim is to present a spider in a harmless, non-threatening way.

A hypnotist once tried to get me to visualise a spider with a clown nose and clompy boots… But I wasn’t fooled.

This was at the back of my mind when deciding on a few things about this project.

Anyhoo, a few more photos of my pink wire spider – the first step to dipping my toe in the water of finding out more about phobia. Arachnophobia in particular. And thinking of ways to work with it.

Here’s to my eyes behaving enough to allow me to attempt to draw this thing…

If you have any cool spider photos you’d be happy for me to use, I’d be delighted if you could send them to me!

[email protected] or through a message at my Jane Baxter Art Facebook page

Eye Eye – an update – Living with Vision Loss

Eye photo - corneal transplant - 4 months on with stitches

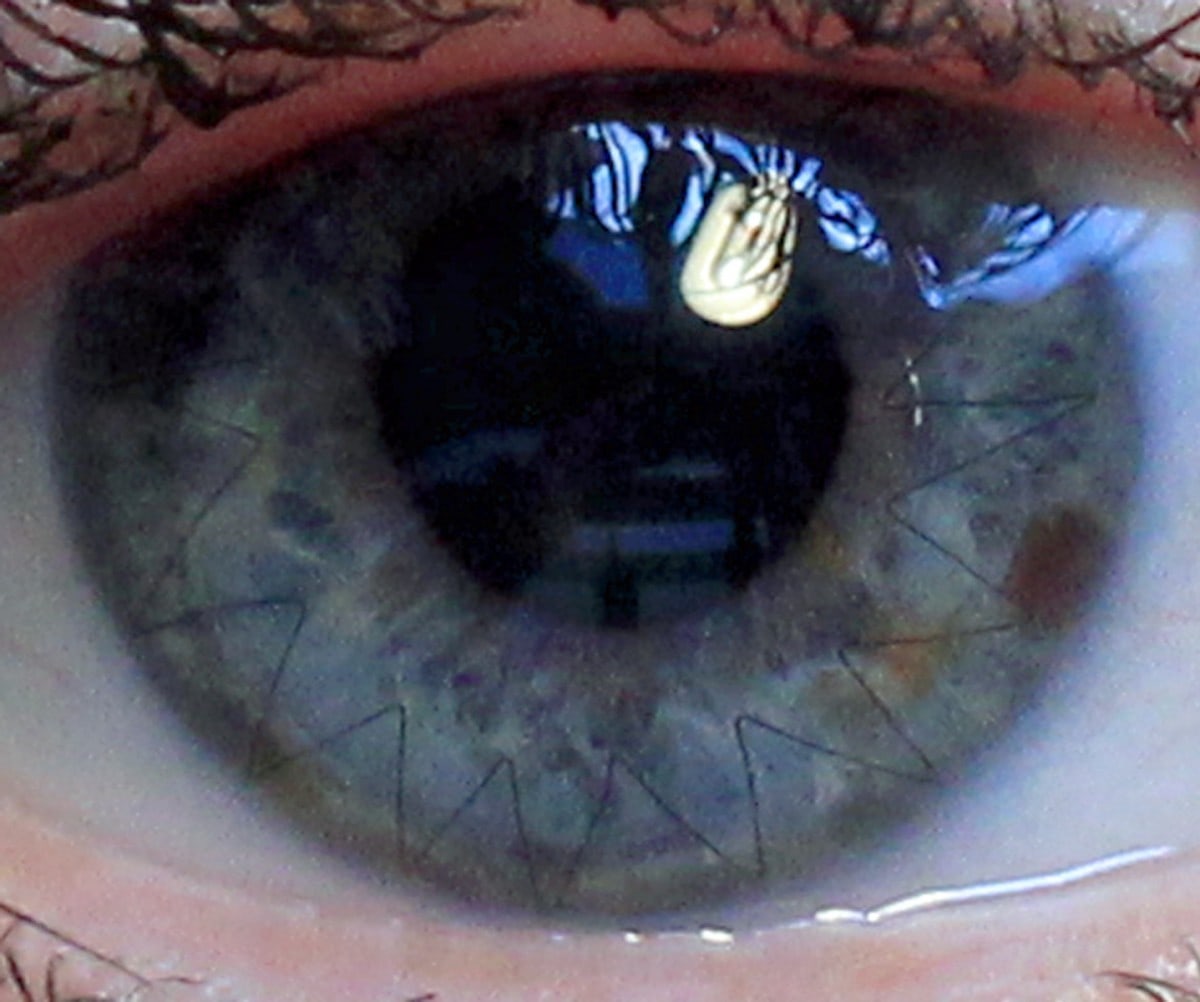
It’s been almost four months since my corneal transplant operation. Time for an update! Not that there’s a awful lot to tell… So I’ll talk about life with $h1tT? vision instead. The picture above shows my stitched cornea, taken today. I held the camera away from me, listened for it focusing and pressed the button. The wonders of auto-focus. If only it were that simple with eyes!

Since last time, I’ve had several appointments up in Edinburgh, both at the hospital and optician. Thanks again to Malcolm for taking the time out of his working days to drive me.
My new cornea is ‘clear and healing’, which is good. My consultant is keen to remind me that my vision won’t settle until my stitches come out, in 2 years time. So, I’m 4 months down, 20 to go. My quick as a flash arithmetic skills tell me that’s equivalent to a fifth of the way through. (Please let that be right!)

Drops

My drops have been reduced from every two hours to four times a day, and now three times a day. Much more manageable! They are steroid drops, to reduce the chance of rejection, and as anti-inflammatories. From a ‘zero waste’ point of view, I was pleased when I went from single use vials to a wee bottle. But my last prescription came as the vials again. However, I do find them easier to use.

Photo of Maxidex steroid eye drops 12 Aug 4x a day

People are very kind in asking, and I’m happy to talk about it to anyone who’ll listen! But it is not easy to know if my vision is better than before. I would love to be able to nod and say ‘yes, it is getting a bit better every day’, but it’s not. It’s better than it was when my eye was full of antibiotic ointment after the op, but progress is immeasurably slow.

I totally understand that it’s difficult to know what to say in this circumstance. It is human nature to wish for the best. But sometimes things aren’t that black and white. (And if you’ve got keratoconus [kc], or had corneal issues, you’ll maybe know that black/ white is actually several shades of overlapping grey!).

A joke in the keratoconus ‘circles’ goes along the lines of, ‘have you seen the moons tonight’?! A distorted cornea causes untold visual trickeries. There are photos of multiple moons which do the rounds (get it?) but I have yet to see one which depicts anything similar to my vision.

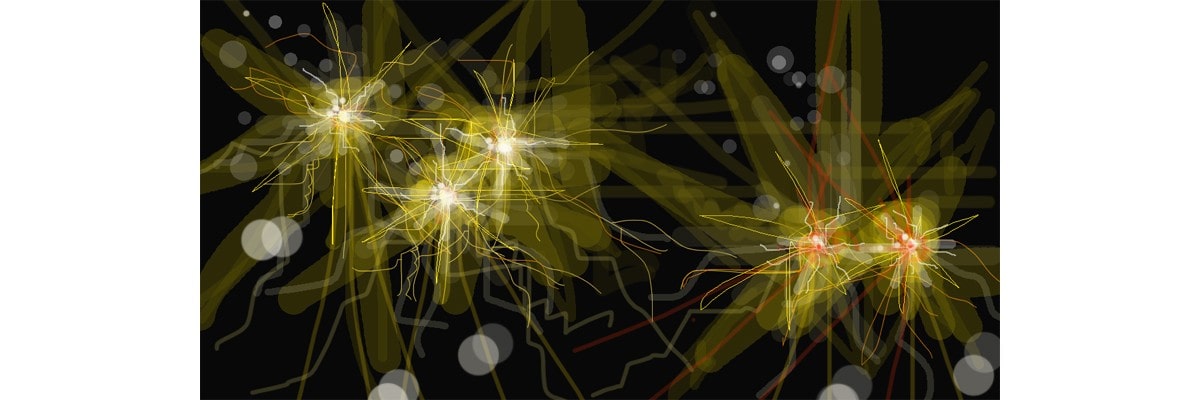
I had a wee go at seeing if I could show what my night vision looks like, but this is as close as I could get.

It’s obviously hard to see what I can’t see to try and draw what I can’t see…

Imagine 3 street lights and a car brake lights:
keratoconus cornea visual distortions night lights image visualisation simulation

This is a 2d version of a 3d issue – the rays/ antlers/ spider webs/ snowflake patterns come towards you from every angle. This maybe helps visualise the issue with driving just now! (don’t worry, I’m not!) I can appreciate that it might look like pretty fireworks, if there were an ‘off switch’ I’d agree.

Daytime vision is less obviously distorted, but the same thing is obviously happening. With my piggy back lenses in my left (better/ non-transplant) eye my cornea becomes smoother. But whilst less pronounced than without lenses, the distortions still creep in. Especially around edges and hard/ straight lines.

Lenses

I’ve been having problems with my lenses too. That’s really what started me off on this part of life’s rich tapestry… My specialist optician rang my local optician to find out what kind of material my old lenses used to be made of, because I didn’t ever have a problem with my lenses ‘fogging up’ before. I’m onto my second lens with this new (old) material. The first lens was fine, but as I have large pupils, I could see the edges of it. And it slipped off my cornea a couple of times. Is this interesting? Just checking!  So, she ordered a slightly larger lens, with a tiny tucky edge. 10 minutes in, and it had fogged up.

Imagine someone has smeared your eyes with vaseline. Or you’re trying to see the world through a steamy shower curtain. Or through an inpenetrable mist. And it hurts. That is maybe a small way to appreciating the experience of a fogged up lens. And when you rely completely, wholly, soley on your lenses to leave the house, you can maybe appreciate the sheer frustration of this ‘game’.

Allergy

Just this past weak, my eye also did an interesting allergy thing. I’ll not submit you to that photo, but my eye ‘reacts’ to my lens(es) being in my eye, and the whole of my inner eye socket area swells up with fluid. It’s not attractive. And it feels horrid too. Clearly, that means a few days without my lenses to let it settle down again.

On a good day, I manage up to 4 hours with my piggy backs in. If I’m out morning and night, I have to plan if I wear them for a couple of hours in the morning so that I can wear them at night. Or rearrange things, and stay in all day so that I can see when I’m out later on.

Coping Strategies

Frustration doesn’t really go there. With a lens in my better eye, I feel vaguely capable. I can see better to see people, and it’s people that matter. My nearest and dearest are well versed in letting me know that e.g. that’s not a dog it’s a bag, or bring something within sniffing range to read, or having me follow half a step behind, cos I can’t see where I’m going.

I’m told I have excellent coping strategies. This is both a blessing and a bad disguise.

People can’t necessarily tell that I can’t see properly. I can touch type. I work out my surroundings quickly. And recognise voices, listening carefully. I remember what’s where (or supposed to be there). Using touch is another way of coping with what you can’t see. Technology helps too. There’s more than just large print books these days. I’ll certainly put on a good act too. The thought of being seen as ‘less able’ is incongruous to my fierce sense of independence, even if I know that’s really just a thin veil. Come to terms with it? No thank you!

Someone did say that they imagine your other senses become like super powers to make up for the missing sense. But I’d rather have my sight back.

Look into my eye (long overdue a picture):
Cornea transplant photo of eye 4 months

Leaving the house lens-less and unsupervised is a no. Nope, not a good idea. Not at all. Never.
Apart from the obvious safety issues around trip hazards and roads, there’s the hideousness of recognition. Or lack of. A shout out of thanks to the people who offer lifts and come and get me to get me out!

In context, the print studio on a Wednesday night, I know who is there (there’s four of us), I know where they sit, the space is small enough that I can tell who is who. (And obviously there’s a lot of chat going on as well as all the hard work, so that helps). Though the lack of being able to see faces, gestures and lip-reading can also lead to a difficulty in hearing. Just as smell and taste are closely linked, so are seeing and hearing. And I’m not joking, seeing and thinking! My brain is so taken up by trying to work out this crazy world of distortions, there’s sometimes little left for actual thought.

Multiplication

I can see close-up better. Not well, but better. If I look at the letter Y on my laptop keypad for example, I can count at least 6 Ys. If I try to use a ruler, I can’t see which edge of the ruler to use, or which line to mark it up to, as there are many.

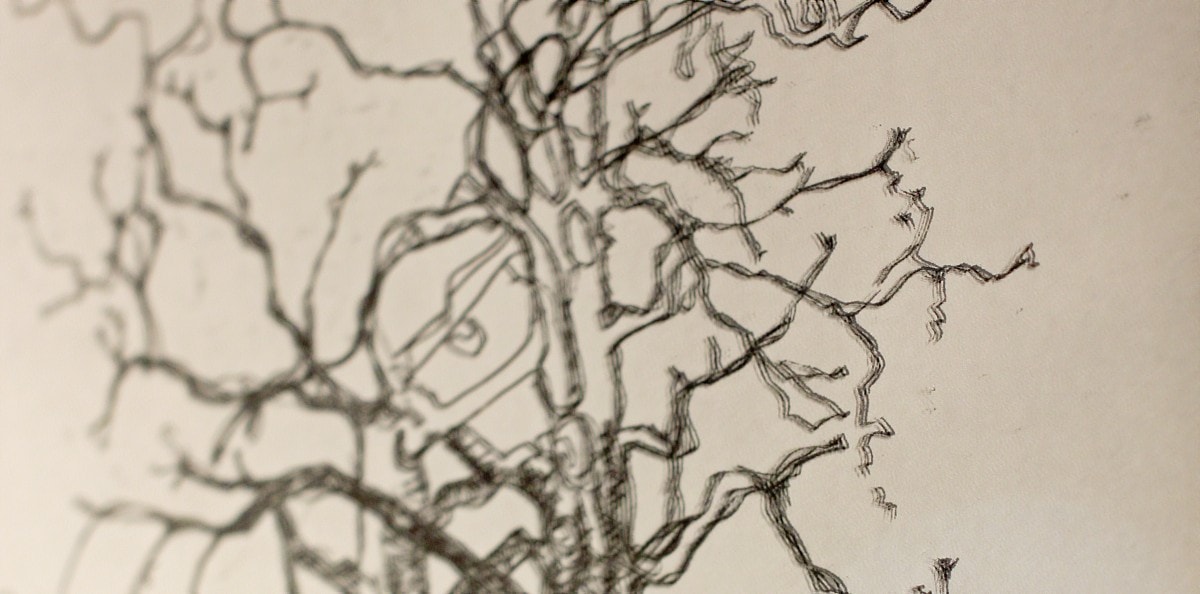
Malcolm looked at one of my prints on his big computer screen and asked how I’d managed to achieve the cool 3d effect… I hadn’t, but hadn’t noticed. The plate must have slipped slightly in the press, and printed a second image. Multiply this by 3 or 5 or 7, and you have something close to my vision!

Look from right to left:
Multi layered vision - keratoconus type of ghosting distortion

It can hurt my brain trying to work it all out.

It’s difficult to explain, but with my nose closer to the table, there is less information for my eye to take in. And a bit like being able to touch type, there is also a certain retained ability in being able to draw. If I let myself think about it too much, I’d cry. There’s nothing more I’d love than to be able to see clearly to draw. A sharp edge. A single line. Clarity, definition, detail.

About time for some pretty pictures…

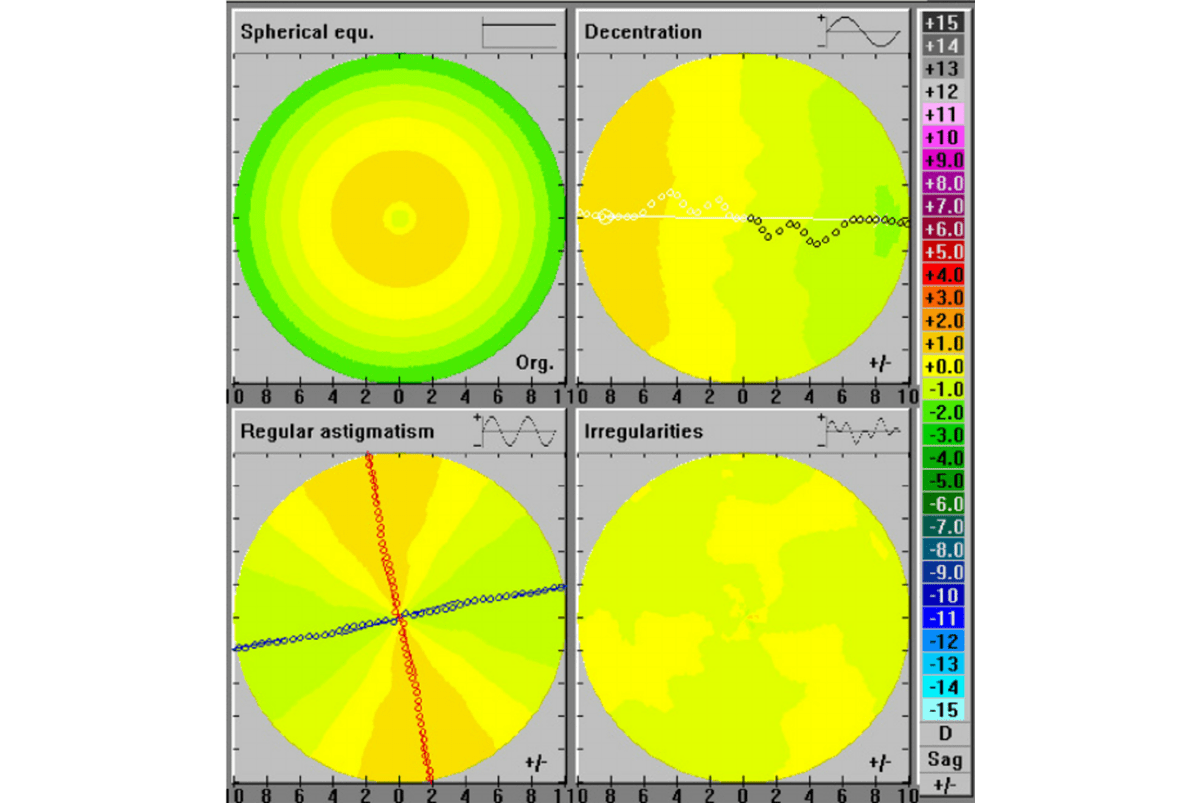
I get a topography at every hospital appointment. I’ve shared them before – they are images taken by a pentacam machine which show things like the curvature, thickness (or thinness – all important with kc, as it’s the thinning cornea that causes the distortions). I’ve been taking photos.

Here is a typography of a ‘normal’ eye for comparison (did you spot the typo?!):
A 'normal' typography, taken from www Fourier-analysis

Nice, even colours, all looking consistent and even and regular!

And here’s mine (from August 2019):
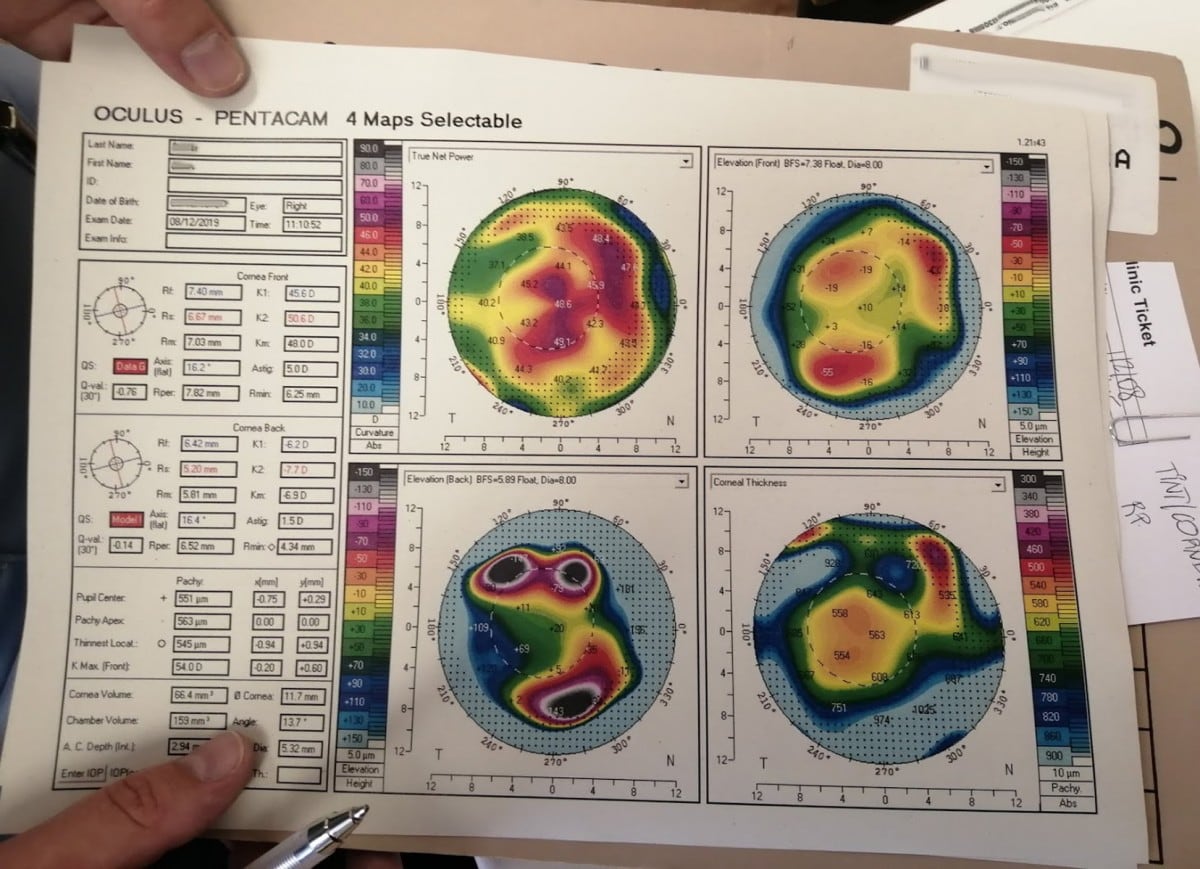
Right eye 2 month post transplant Topography

And a wee (spot the difference/ entry level) comparison – from November 2018 on the left, and September 2019 right:
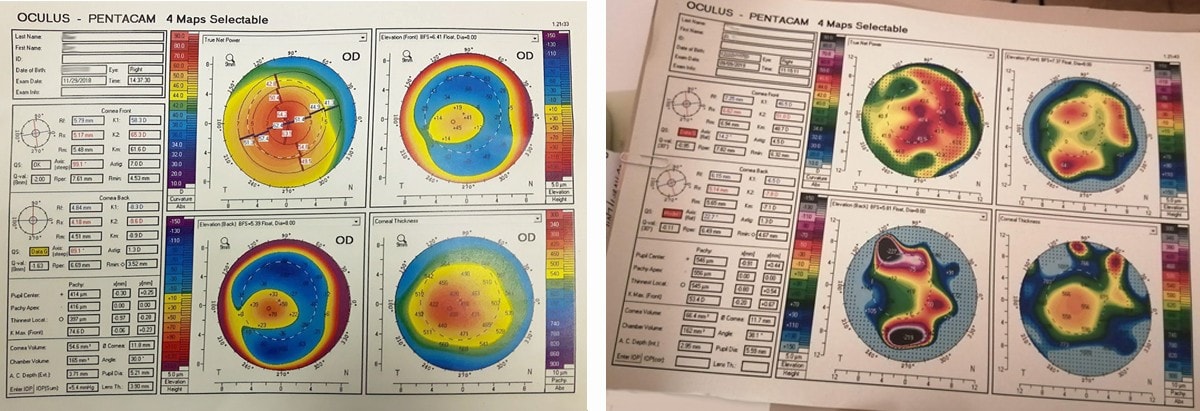
Spot the difference Topography comparison

That’s advanced kc, pre transplant on the left, and new cornea, post transplant on the right.
I really don’t understand any of it, but I have an inkling that it makes my tricky vision just now a wee bit more understandable. Little as that makes sense!

And just because it never gets a look in (hahah) these days, even though it is doing all the hard work, lets hear it for the magnificent, ‘good eye’ Ms KC Lefty!
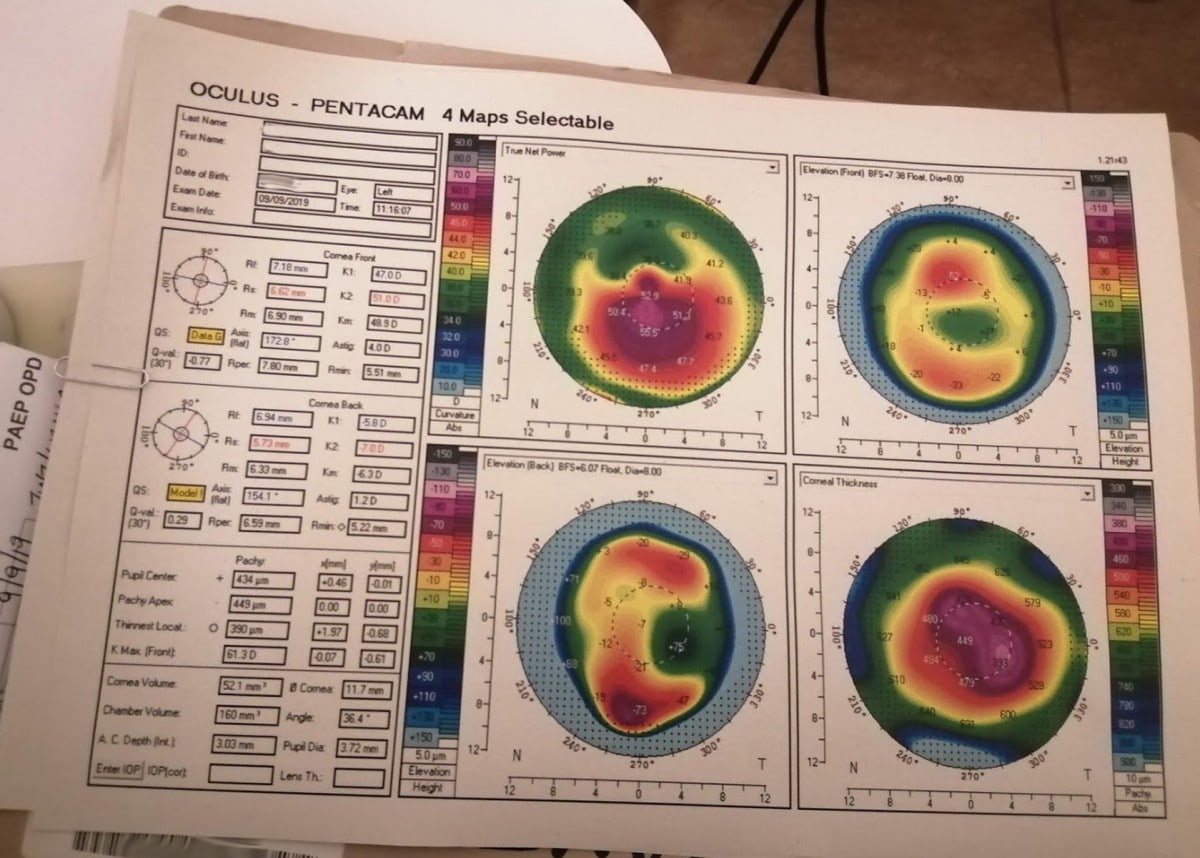
Left eye topography chart from 9th September 2019

I spoke to an orthoptist (socially) recently. She treats children (on the whole) with squints, wobbly and lazy eyes. She was very interested in my kc, and transplant, and it was good chatting with someone who knew a bit of what I was talking about! She did, however, tell me that the vision in my right (transplant) eye can’t get any better than the vision I had at the age of 7. Up until then, your eye is developing. If it didn’t reach full potential by then, it is too late (to put it bluntly). I can’t pretend that my wee heart didn’t sink. My right eye has always given way to my left, never been as strong, generally lacking. My twin brother Keith has the same issue with a very weak eye (though he doesn’t have kc).

Super specs

She actively advises parents to get their children glasses if she detects a slight imbalance with a child’s vision (amblyopia). There are tests at nursery school nowadays. Ronan must have had a similar eye test, because he wore glasses when he was wee until our optician told him (when he was seven or eight) that he didn’t need them any more – his sight was perfect!

Look after your eyes everyone – they’re the only ones you have (and someone might just need them when you’re gone!).

Into the Trees – Copper Plate Etching – Work in Progress

Into the Trees Copper plate BIG resit drawn into

A look at ‘how to make a copper plate etching – step by step’. A wee behind the scenes glimpse of this traditional (non toxic) printmaking process.

I took some photos (when I remembered) of a few stages of the copper plate etching process. Four of us use the space and facilities of the Print Studio at Gracefield Arts Centre in Dumfries on a weekly basis, occasionally more often. I am down to one dodgy eye (keep going lefty!), but the company of good friends and a bit of banter makes a Wednesday night!

[Descriptions are beneath each image below…]

The Beginning

The process begins way back at the beginning with cutting the copper to size. We use a heavy duty guillotine. This requires full body weight and a bit of a jump to get the blade through the plate! Next, to stop the sharp edges from damaging the press blankets (or soft tissues), the edges of the plate require filing. This makes the bones in your forearm rattle, and the sound can set your teeth on edge. However, it also creates a nice bevelled edge to the embossed plate-mark on the paper. After filing, the surface of the plate must be degreased…

Degreasing

Sharon, Demie, John and I have been through many different non-toxic solutions, and combinations, to prepare the plate’s surface. I prefer to use Bar Keeper’s Friend – a powder originally made from a compound found in rhubarb! (One of the BKF chemists had noticed how clean his pots were after boiling it)! I sometimes think I can feel rhubarb having a ‘degreasing’ effect on my teeth! I remember my mum using it back in the 1980s.

I’ve heard that soya sauce is another effective degreaser worth a shot! Why not make it a culinary event?!

Once water stops pooling on the surface of the plate (this can take a lot of elbow grease), you need to apply a hard resist. This protects the copper from the etch. Thus drawing into the hard resist to expose the copper, which will then be etched – suspended in a ferric chloride solution (Edinburgh Etch).

Resisting!

We were introduced to Lascaux hard resist, which the non-toxic studio provides for users. This is a water-soluble, translucent, acrylic resist. It dries hard. I hated acrylic paint at Art College, and I found it difficult to draw into here! My arm would hurt from the effort!

Sharon and I have moved on to using BIG, a black (or red) ground which I find a lot easier to draw into. Sharon tested the red, then I bought the black… It does require ‘cooking’ – though I advise against popping a copper plate in with your tea… It was a messy experience (with burnt results for tea!).

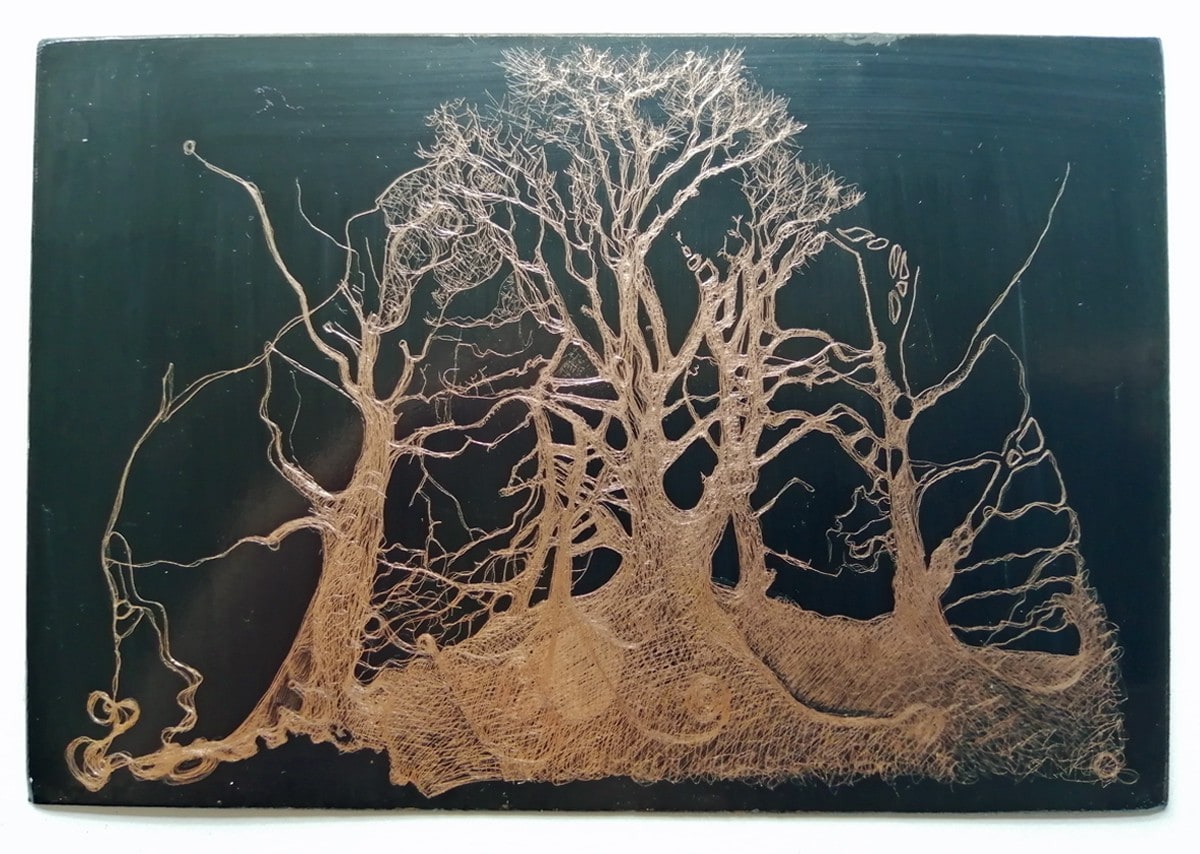
Into the Trees Copper plate BIG resit drawn into

My favourite part of the whole process – the drawing! You use a needle (etching tool) to draw lines and make marks breaking through the hard resist to expose the copper. I am keen to try out some different tools, as I am still using the £3 bobby basic needle I bought on our course 3 years ago!
The picture above shows my plate drawn into, and ready for its first dip into the etching tank. I tend to prefer drawing this stage free-hand, though others spend time on perfecting drawings beforehand and use tracing and carbon papers to transfer their designs.

Etching

As above, the plate is suspended in a solution of ferric chloride and citric acid – Edinburgh Etch.

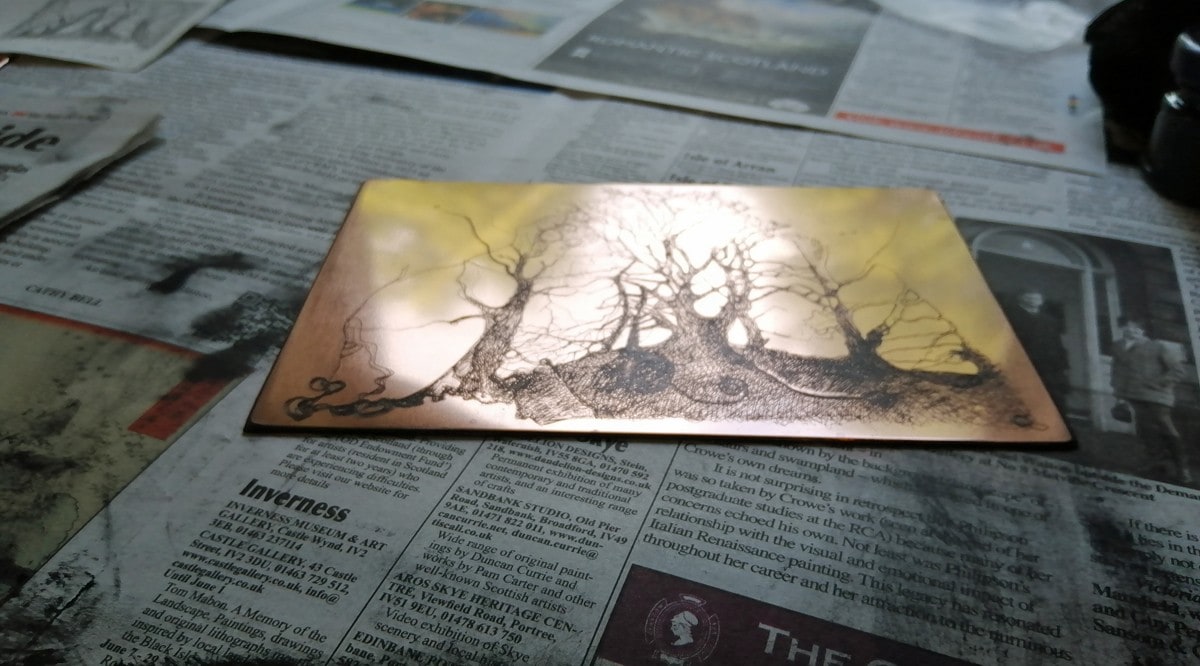
Into the Trees copper plate Etched in Ferric Chloride Edinburgh Etch solution

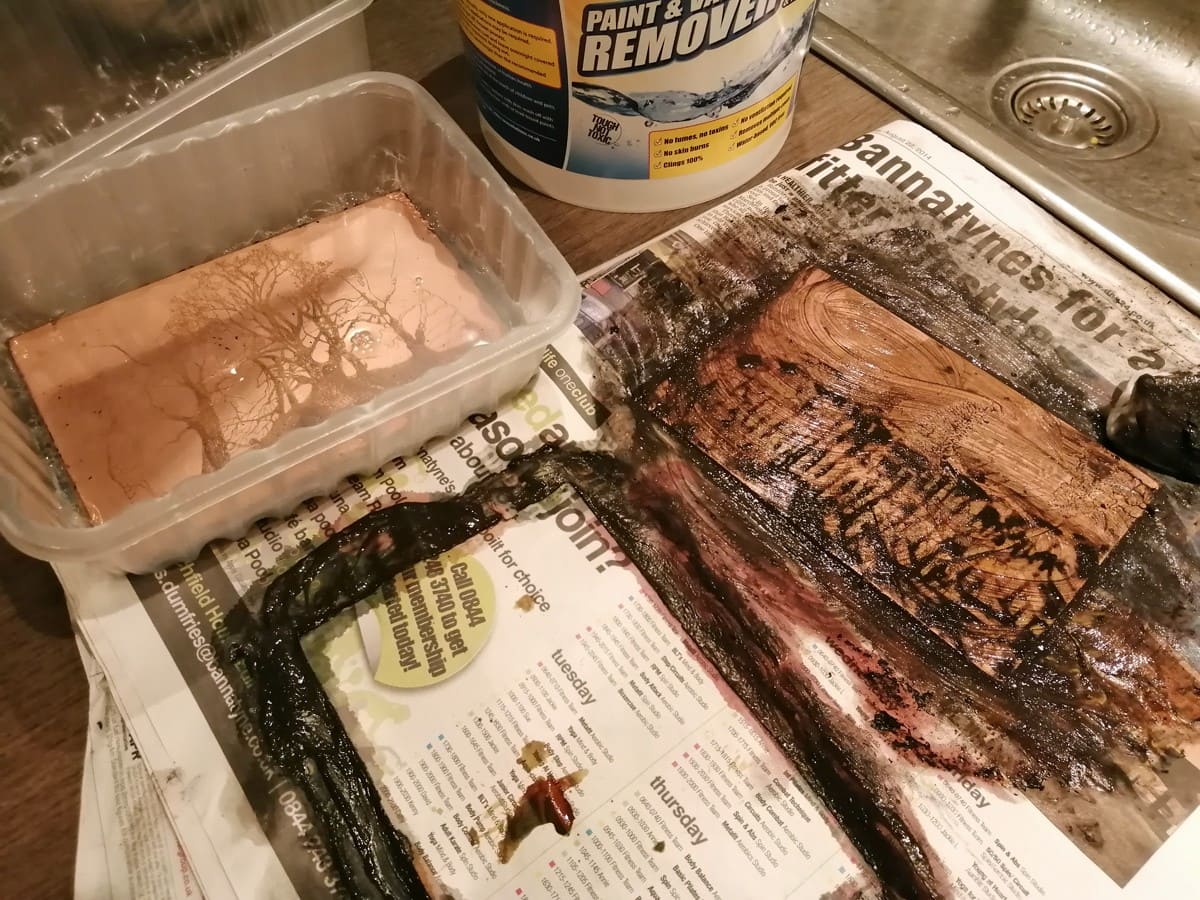
Sometimes on removal, the plate oxidises and becomes tarnished. I rather liked the pretty pink effect this time! (I’ve yet to try it, but believe that a salt and vinegar solution will de-oxidise the plate). The etch has ‘bitten into’ the lines, whilst the BIG (black) ground resists the etch/ protects the plate. These covered areas will be white when printed, the lines black. And the whole plate is in reverse. It can boggle the poor old mind a bit.

Stripping thehard resist from the copper plate for Into the Trees

Stripping the hard resist from the plate can be a messy business! Again, between us, we have tried and tested quite a few methods of stripping! My favourite is this non-toxic paint stripper which has proven itself on everything (apart from one layer of something stubborn on some old tongue and groove back at home!).

The plate is now ready for inking up.

Into the Trees inking up the copper plate

We use Cranfield Safe-Wash etching ink which is oil-based but water-soluble – it washes away with soapy water (as opposed to oil-based ink which requires white spirit or vegetable oil to remove). And scrim – a coarse gauze fabric – to push and rub the ink into the lines of the etched plate. Everybody has their own particular way of inking up and then removing the excess.

The Middle

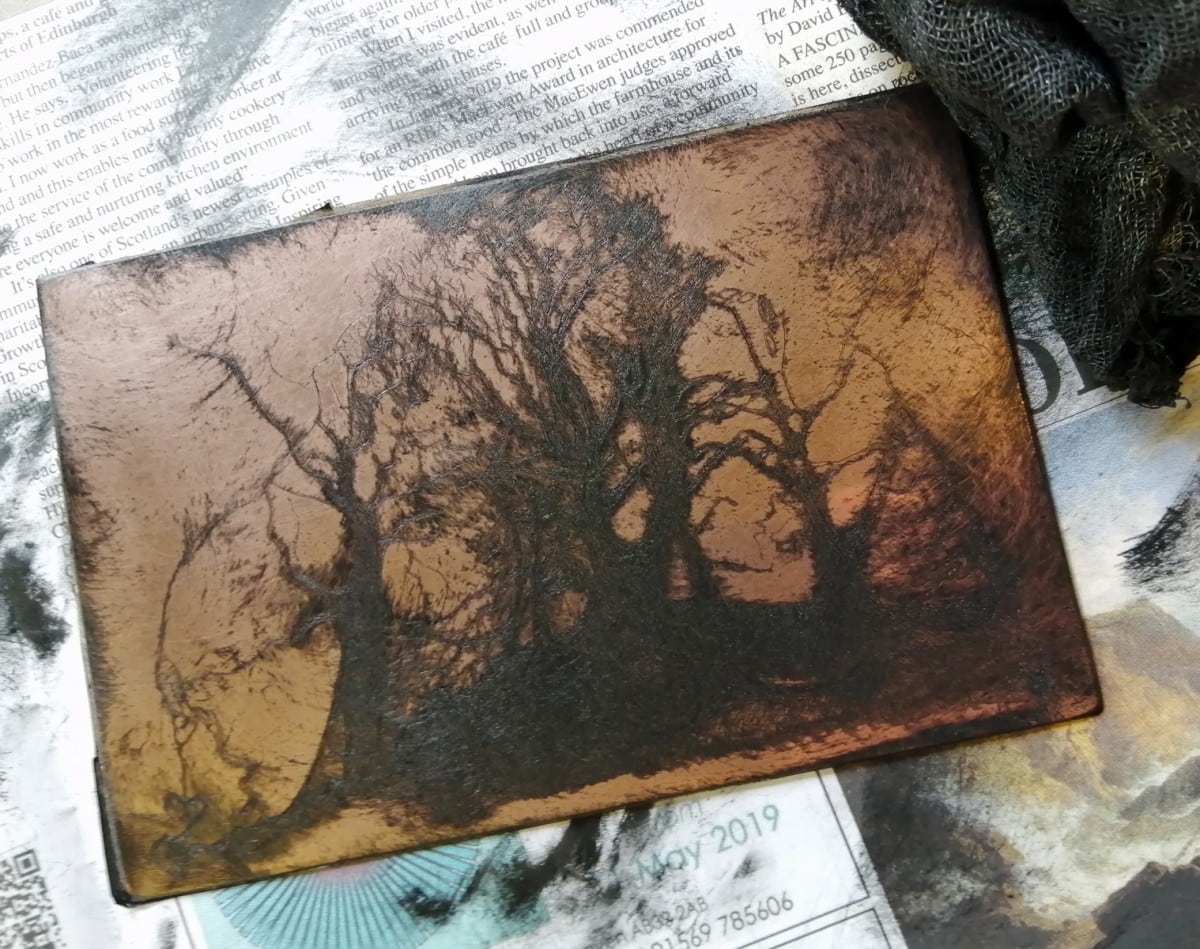
The photo above shows my ‘Into the Trees‘ plate at a stage where a fair bit of the ink has been removed. I will already have used 2 different pieces of scrim to get to this stage, and would be changing to another. I’ve used the same pieces of scrim for… quite a while now! One ink laden, one middling and another one (or two) with a lot less ink on them. It is a tricky process to ensure the desired balance of dark/ light lines. Remove too much ink and the lines are too faint, leave too much ink and lines aren’t defined… As a final flourish, a sheet of Yellow Pages is used to ‘polish’ the surface. Our tutor, the late Silvana McLean told us that you will get a ‘feel’ for a plate!

Into the Trees Copper Plate inked up

The plate is now inked up and ready to print.

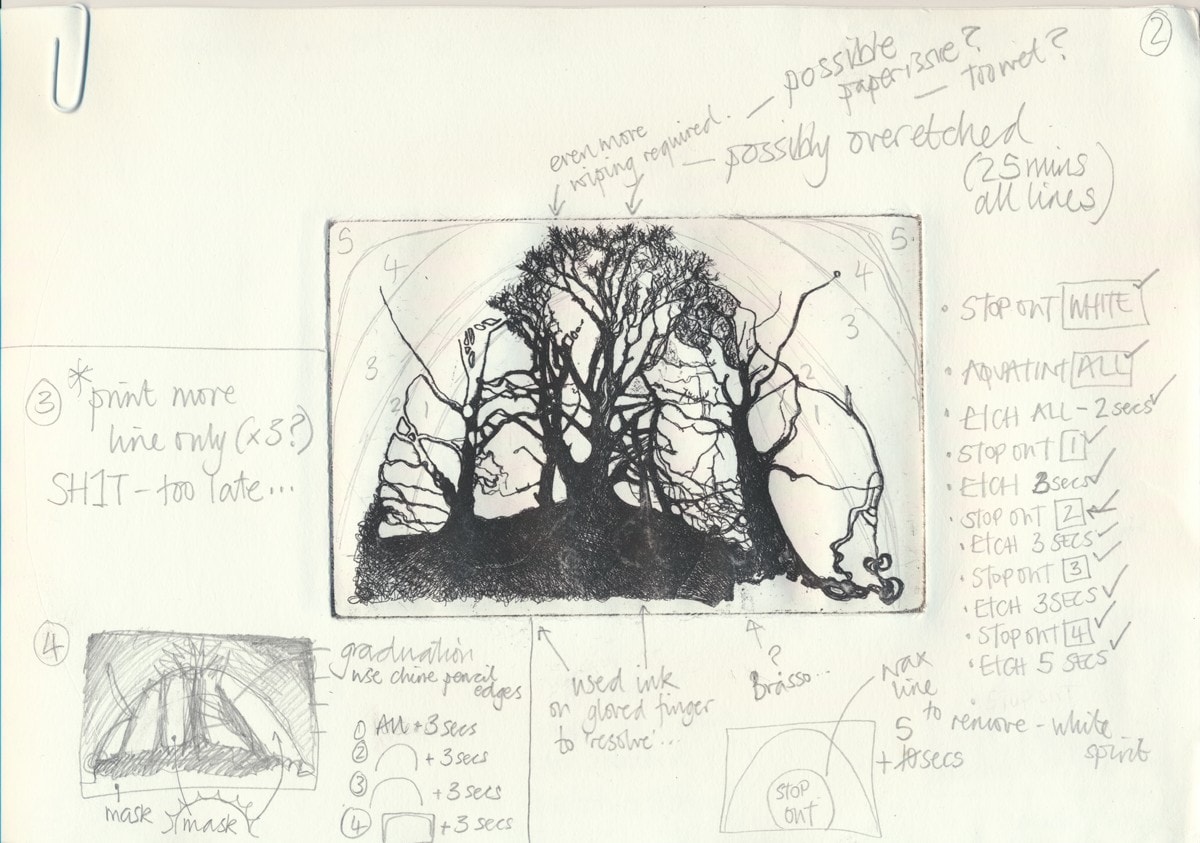
Into the Trees notes page 2 for wip

I have a (very) heavy sketchbook full of disasters/ proof prints/ bits of copper/ stages of aquatints etc. And copious notes! This is a fairly typical example [above]. I have learned that the notes have to be legible and coherent to some degree if I am to find them useful next time (or to come back to next year!). I’d have used my best handwriting had I known I would be taking photos!

Aquatint

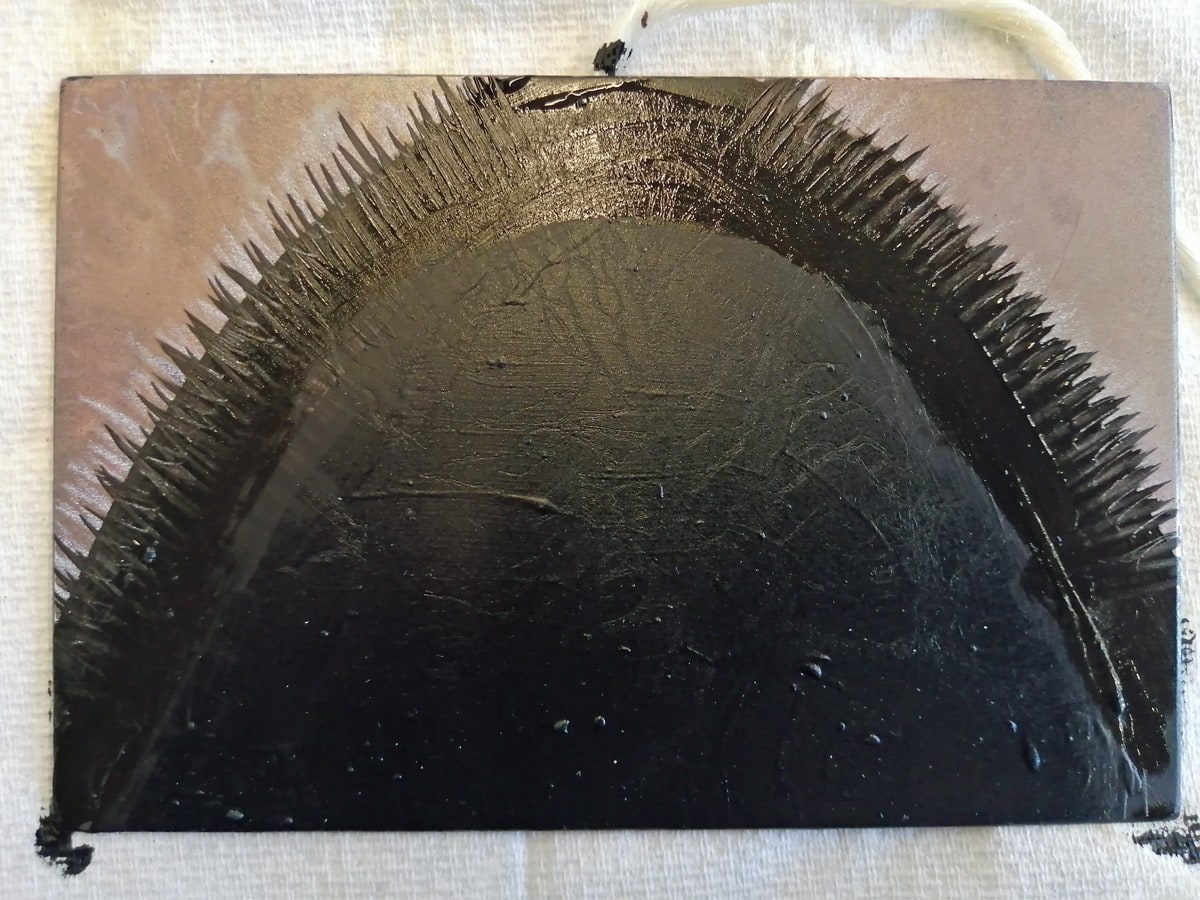
Stop out coarse feathering to merge the aquatint

I don’t actually have any photos which show the aquatint. It is basically spray painting the surface of the plate (traditionally using a flammable rosin). We use an airbrush and a special aquatint resist. This process lays tiny dots of resist on the plate, which once etched will create areas of tone. The depth of tone is dictated by the concentration of aquatint and the length of time the plate is etched.

The background of this plate was etched no fewer than 5 times, for a few seconds each time. In between etching, a further area was ‘stopped out’ with stop out each time! A lengthy process. The picture above shows the stop out (resist) somewhat clumsily, coarsely, nae, crassly ‘feathered’ with wax based pencil at the edges. I am still trying to find a stop out that I enjoy working with… This one thick and lumpy, another thin and unpredicatable.

More experimentation needed!

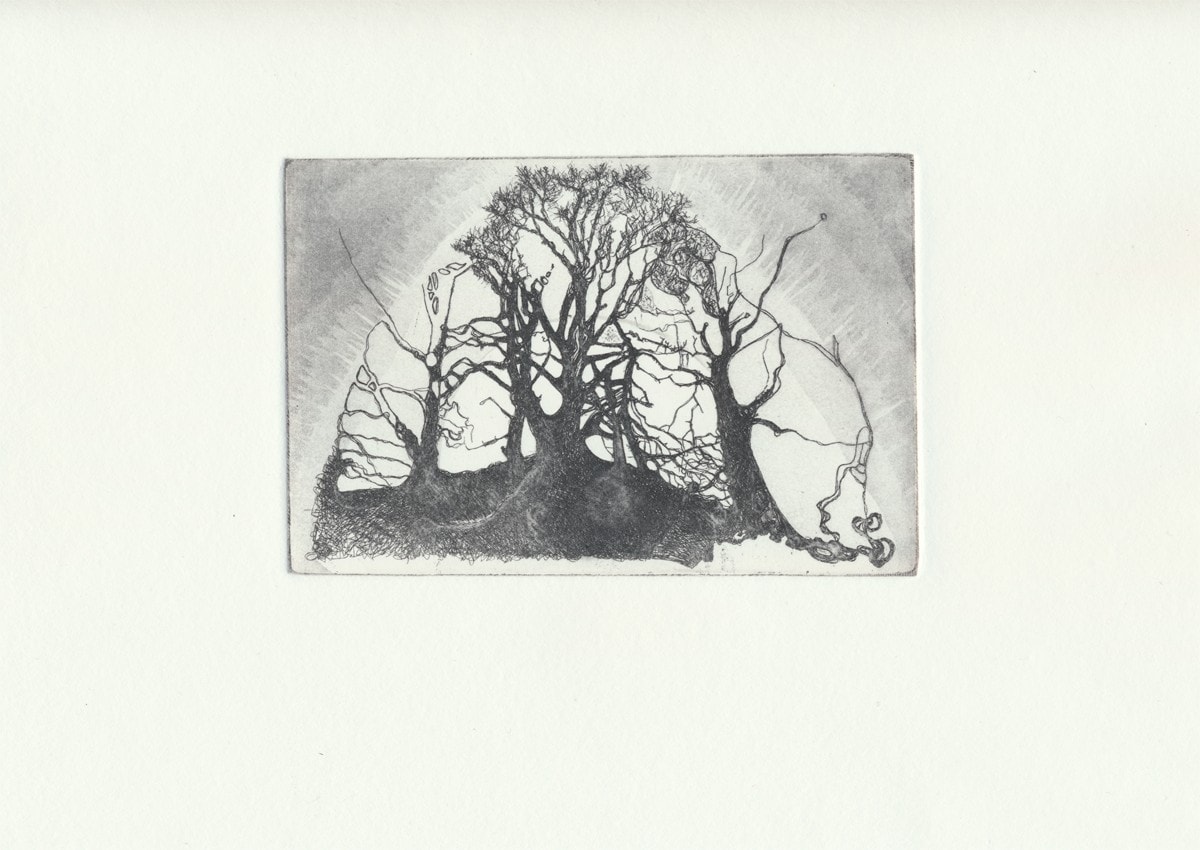
Into the Trees copper plate etching print scan for wip

You can see the tone created by the stop out/ aquatint process in the proof/ print above. (This proof is destined to be another page in the sketchbook!)

The End

Therein lies a whistle-stop tour of the etching process. It can take several weeks to get to the stage of actually printing a plate. Each step along the way is riddled with endless possibilities for disaster. The nearer the end, the higher the stakes!